The Rap on Wrapping: 10 Tips for Effectively Bandaging a Wound
October 12, 2017
Keywords
Categories
Wrapping wounds is an art, and hence, it comes easily to some and more difficult to others. This post won't make you a wound dressing artist, but it does provide some tips for good bandaging techniques. The word "bandage" (in the US) often refers to a primary dressing, so "wrap" better describes a bandage that is long, narrow, and may be used to secure a primary dressing or obtain graduated compression on a limb. Before starting, there are a few points to make regarding the laws of physics (which "ye cannae change"). Mostly, these are intuitive:
- The more narrow the wrap, the greater pressure exerted; the wider the wrap, the less pressure exerted, because the pressure is spread over a wider area
- The larger the circumference, the less pressure—hence, on a normal shaped leg, there will be a gradual decrease in pressure between the ankle and the calf, giving graduated compression—a higher level at the narrow ankle, to a lower level at the larger circumference of the calf
- More layers of wrap means more pressure, so the closer the overlap and the more layers, the more pressure is exerted underneath
- Increasing the tension (stretch) on the wrap increases the pressure it exerts
Pierre-Simon, marquis de Laplace was a very able mathematician and physicist of the early 19th century, and he came up with the laws relating to wound bandaging. However, they do not hold up entirely when it comes to squishy legs, as well as the variability of bandages and the users.1 Working out sub-bandage pressures and marketing transducers that give accurate readings is a bit of a mire just now. So until we have a robot that wraps perfectly, it will remain an art that will be easier with a little guidance. Here are the basic top ten tips. We can visit wound bandaging choices another time, but today we’re looking at a 4-inch spiral leg wrap on a regular size adult leg.
Top 10 Wound Wrapping Tips
1. Know why you are wrapping the limb.
The purpose of wrapping is to secure a wound dressing in place, improve venous return and enhance wound healing by improving blood supply, lymphatic drainage and reducing edema.
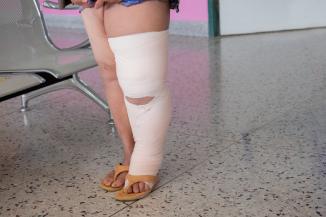
2. Assess the limb.
- Measure the circumference of the foot at the smallest part of the midfoot, the ankle at the smallest above the malleolus and lastly the calf at the largest circumference of the leg below the tibial tuberosity (there may be a facility protocol for this).
- Palpate at least the dorsalis pedis pulse and note the color of the leg, foot and toes.
- Check there are no wounds and that the heel and ankles do not have any pressure injuries.
- For bony prominences and frail skin use a soft under wrap or offload with padding.
3. Use a 4-inch bandage.
If a 2- or 3-inch is used it may exert too much pressure.
4. Before starting, read the directions from the manufacturer.
It is necessary to know if you are doing:
5. Control is optimized by holding the wrap as shown (figure 1) and working laterally to medially.
- A simple spiral.
- A spiral with a figure of eight at the ankle
- A classic figure of eight all the way up.
- How much overlap is needed.
- How much stretch/tension to apply. To 'get a feel' for this, hold the wrap, pull it full stretch a few times and then a few times at the desired stretch. If using a wrap with no specific instructions, use a stretch that gives conformity and comfort.
(This is the standard way in the US, in Europe medial to lateral is preferred).
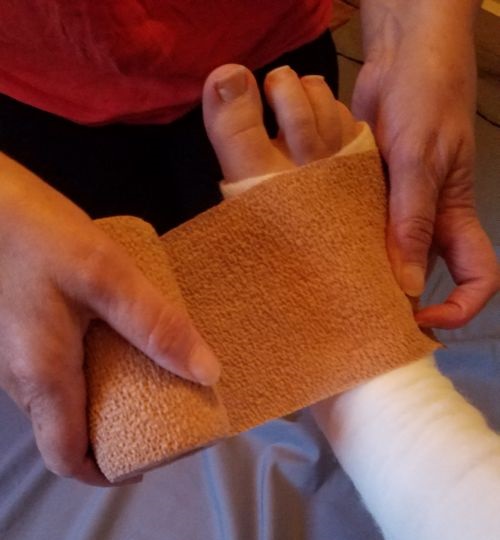
6. Start at the base of the toes at the 5th metatarsal and go across the dorsum.
If you start at the ankle there will be a tourniquet effect and the foot will swell. If there are concerns regarding being able to fit into shoes leave off under-layers and padding but not the compression wrap.
7. Secure the wrap with a full circle.
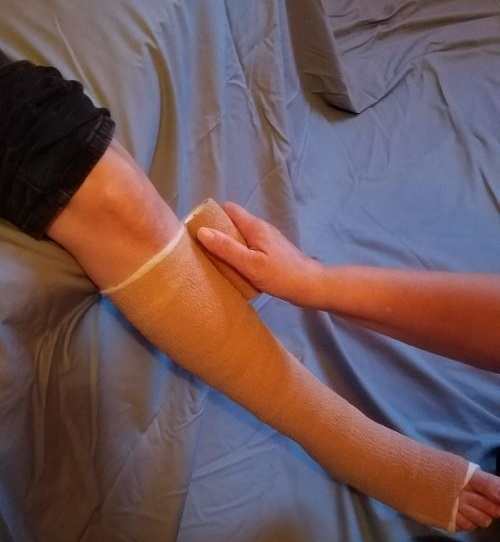
8. Finishing off the roll with extra circles above the calf equals a tourniquet (Laplace's law).
9. A band of different wrap as a last circle (for example sticky wrap or wide adhesive tape) forms a tourniquet
It is safer to chevron rather than circle a limb or digit (figure 3) this is because the cross over point of the chevron is more proximal and not at the same level which avoids a tourniquet.
10. Check the toes are a good color and that the patient is comfortable in the wrap.
They need to know:
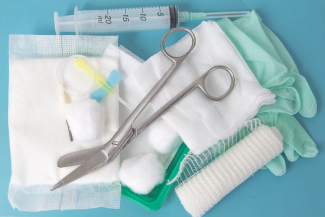
Bandaging Basics: Don't Forget Safe Removal of the Wrap
Applying a wrap is not the entire story. Safe removal is very important, as "doing no harm" extends to the use of scissors. Maybe the rule of scissors should be the next blog item! Bandage scissors are designed to remove bandages, but still need to be angled correctly. The operator's fingers should be between the patient and the wrap whenever possible. This is because the operator's proprioception protects them. Wrapping a wound is a breeze after just a little practice, so get a 3-inch Ace and practice on your child (as the dog may not be appropriate in this instance). The post-test here is: why a 3"?
References
1. Melhuish, J., et al., The Physics of sub-bandage pressure measurement. Journal of Wound Care, 2000. 9(7): p. 308-310. The laws of physics https://www.youtube.com/watch?v=nfZ12UGiisM
About the Author
Margaret Heale has a clinical consulting service, Heale Wound Care in Southeastern Vermont and draws on her extensive experience as a wound, ostomy and continence nurse in acute and long-term care settings to provide education and holistic care in her practice.
The views and opinions expressed in this content are solely those of the contributor, and do not represent the views of WoundSource, HMP Global, its affiliates, or subsidiary companies.
More from this Author
// fixed missing link variable.
// fixed missing link variable.
// fixed missing link variable.